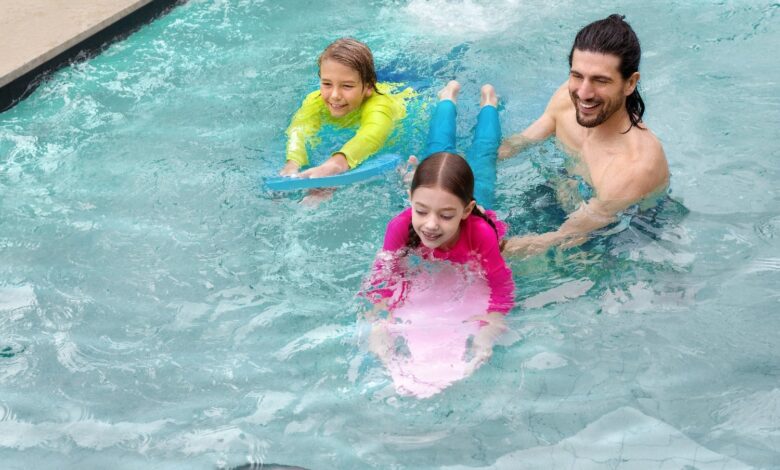
Most backyard pools sit still — a quiet rectangle of water waiting for someone to jump in, swim a few strokes to the wall, turn, and repeat. But what if your pool could push back? Swim jet systems transform ordinary in-ground pools into dynamic training environments, generating a continuous current that lets you swim endlessly without ever reaching the far end. Whether you’re a fitness enthusiast craving a daily open-water workout or a family looking to add excitement to your backyard, a swim jet delivers both purpose and play in a compact footprint.
For homeowners considering this upgrade, the decision involves more than choosing a unit. You’ll need to understand the swim jet P series price, navigate the installation process from plumbing to electrical work, and decide whether complementary improvements like new pool coping make sense while the crew is already on-site. This guide walks you through every critical consideration — costs, installation steps, material choices, and ongoing maintenance — so you can confidently turn your existing pool into a personal swim spa that serves you for years to come.
Understanding Swim Jets: More Than Just a Pool Upgrade
A swim jet system is essentially a high-powered water propulsion unit installed into the wall of your pool. It draws water in through an intake, pressurizes it using a dedicated pump motor, and forces it back into the pool through precisely angled nozzles. The result is a smooth, wide current — typically three to four feet across — strong enough to keep even competitive swimmers stationary while they stroke at full effort. Unlike propeller-based swim-in-place systems that create a narrow, turbulent stream often riddled with air bubbles, jet-driven units produce a laminar flow that more closely mimics the resistance of open water.
The practical benefits extend well beyond serious training. A swim jet eliminates the need for a full-length lap pool, which means homeowners with modest backyards can enjoy continuous swimming in a pool as short as twelve or fourteen feet. Families discover new ways to use the current — kids body-surf it, adults walk or jog against it for low-impact cardio, and physical therapy patients use adjustable speed settings for rehabilitation exercises. Because the unit mounts externally or within a compact vault beside the pool shell, integration with most existing in-ground concrete or gunite pools is straightforward. The pool itself doesn’t need to be enlarged or reshaped; it simply gains a powerful new capability that redefines how every member of the household interacts with the water.
See also: Tech Platform Insight Portal Cbwebsys Revealing Verified Digital Signals
Decoding the Investment: Swim Jet P Series and Installation Costs
Understanding the full financial picture before committing to a swim jet project prevents surprises and helps you allocate your budget wisely. The swim jet P series price represents the core equipment cost, but the total investment encompasses far more — from electrical infrastructure to the concrete work that houses the unit itself.
Factors Influencing the Swim Jet P Series Price
The P Series lineup spans multiple power levels, and the model you choose directly shapes your bottom line. Entry-level units designed for recreational swimming and light fitness generate moderate current speeds suitable for casual swimmers and children, while high-performance models deliver enough thrust to challenge competitive athletes training at race pace. Beyond raw horsepower, the control system adds another variable. A basic analog dial keeps costs down but limits precision, whereas digital touchscreen panels with programmable speed intervals and remote operation capabilities carry a premium. Your existing pool infrastructure also matters — if your electrical panel lacks capacity for a dedicated 220-volt circuit, you’ll need an upgrade before the unit can even power on. Similarly, pools without existing return lines positioned at the correct depth may require additional plumbing runs, and some installations call for a separate filtration pump to handle the increased water volume cycling through the jet housing. Each of these variables layers onto the base equipment cost, making it essential to get a site-specific quote rather than relying on advertised starting figures alone.

Budgeting for Your Project: Beyond the Unit Price
Professional labor typically represents a significant portion of the total project expense. Installers must core-drill through reinforced concrete or gunite walls, set precise angles for nozzle placement, and pressure-test every connection before filling the pool. If your chosen unit requires an external vault — a below-grade concrete housing that protects the pump motor and plumbing manifold — excavation alongside the pool adds both time and cost. Many municipalities require permits for structural modifications to pool shells and for new electrical circuits, so factor in application fees and potential inspection delays. On the operational side, running a high-output swim jet motor adds to your monthly electricity bill; expect consumption comparable to a second pool pump cycling several hours per day. Homeowners who plan ahead by requesting itemized estimates from at least two or three qualified contractors gain the clearest picture of where their money goes and where they might save — for instance, by scheduling the work during a contractor’s off-season or bundling it with other pool renovations already in the pipeline.
The Swim Jet Installation Process: A Step-by-Step Overview
Step 1: Initial Consultation and Site Evaluation
Every successful swim jet installation begins with a thorough assessment of your existing pool. A qualified installer will examine the pool shell material and thickness, measure available space along each wall, and identify the optimal location for the jet nozzles — typically centered on a shorter wall where the current can travel the pool’s full length without deflecting off corners. They’ll check the depth at the proposed nozzle placement, since jets positioned too high create surface turbulence while those set too low lose effective swimming resistance. The evaluation also extends beyond the pool itself. Your electrical panel gets inspected for available amperage and open breaker slots, and the installer notes the distance between the panel and the proposed equipment pad, since longer conduit runs increase both material and labor costs. During this visit, the contractor will also assess the condition of your pool coping and surrounding decking. If the coping shows cracks, loose mortar, or heaving from freeze-thaw cycles, addressing it during the swim jet project makes practical sense — the crew is already mobilized, and fresh coping ensures a watertight seal where the deck meets the pool shell after any structural modifications.
Step 2: Preparation and Plumbing Integration
Once the plan is finalized and permits are secured, physical work begins. In most cases, the pool is drained to at least below the nozzle installation height, though some contractors use cofferdams or localized dewatering for pools that owners prefer not to empty completely. The installer marks precise locations on the pool wall, then uses a core-drilling rig fitted with a diamond-tipped bit to cut clean, circular penetrations through the concrete or gunite. These holes must be exact — even a slight misalignment changes the current’s angle and reduces swimming comfort. After coring, PVC plumbing lines are dry-fitted from the nozzle housings through the pool wall and into the equipment vault or pad area. Installers use hydraulic cement and flexible sealant around each penetration to restore the pool shell’s watertight integrity, followed by a secondary layer of waterproof membrane for added protection against leaks. The swim jet unit itself is then positioned in its housing — either a pre-cast concrete vault buried adjacent to the pool or a surface-mounted enclosure on the equipment pad. Plumbing connections between the unit’s intake, the pool’s water supply, and the discharge nozzles are solvent-welded and pressure-tested at well above normal operating levels to confirm zero leakage before anything gets buried or concealed. If the installation includes a dedicated filtration loop for the jet system, that plumbing runs separately from the pool’s main circulation, with its own suction line, strainer basket, and return manifold to prevent flow conflicts between the two systems.
Step 3: Electrical Hookup and System Testing
A licensed electrician handles the electrical phase, which is non-negotiable both for safety and code compliance. The swim jet motor requires a dedicated circuit — typically 220 to 240 volts — run from the main panel to a disconnect switch mounted within sight of the equipment. Wiring passes through weatherproof conduit buried at code-required depth, and a ground-fault circuit interrupter protects the entire line. The control panel, whether mounted poolside or integrated into a home automation system like iGarden, gets wired and programmed with speed presets and safety shutoffs. With power connected, the installer runs the system through a full commissioning sequence: verifying pump priming, checking flow rates at multiple speed settings, listening for cavitation or air entrainment, and confirming that the nozzles produce a smooth, centered current at the intended swimming position. Water chemistry receives attention last — the fresh fill or partially replaced water is balanced for pH, alkalinity, and sanitizer levels, ensuring the new plumbing components and seals aren’t exposed to corrosive or scale-forming conditions from day one.
Complementing Your Upgrade: Choosing the Right Pool Coping
Pool coping — the cap material that finishes the top edge of your pool shell where it meets the surrounding deck — serves a triple role that becomes even more critical once a swim jet is in play. Structurally, it seals the joint between the pool wall and the deck surface, preventing water infiltration that could undermine the bond beam over time. Functionally, it gives swimmers a grip edge and a safe, rounded surface to push off from or hold onto while resting between intervals in a strong current. Aesthetically, it frames the entire pool, and if yours looks dated or damaged after a swim jet installation disrupts a section of decking, mismatched coping draws the eye for all the wrong reasons. Choosing the right material now, while your pool area is already under construction, ensures a cohesive finished look and avoids paying for mobilization twice.
Popular Pool Coping Materials: Pros and Cons
Natural stone remains the premium choice for homeowners who want organic texture and timeless appeal. Bluestone offers a dense, slip-resistant surface that stays relatively cool underfoot in direct sun, though it commands a higher material cost and requires periodic sealing to prevent moisture absorption and spalling in freeze-prone climates. Travertine delivers a similar upscale look with natural pitting that enhances grip when wet, but its porous structure means staining from leaves or tannins can become an issue without proper maintenance. Precast concrete coping provides the widest range of shapes, colors, and finishes at a moderate price point — manufacturers can replicate the look of natural stone with consistent dimensions that simplify installation and reduce cutting waste. It handles pool chemicals and UV exposure well, though lower-quality mixes may develop surface crazing after several years. Brick coping suits traditional or colonial-style homes and resists fading, yet its smaller unit size means more mortar joints that can crack and admit water if not maintained. Porcelain pavers have emerged as a newer option, offering near-zero water absorption, excellent slip resistance ratings, and uniform color throughout the material. They cost more than precast concrete but less than premium natural stone, and their dimensional precision speeds up installation. When evaluating any material, weigh four factors together: long-term durability against your local climate, slip resistance when wet (critical beside a swim jet where splashing is constant), compatibility with your deck material for a seamless visual transition, and maintenance demands you’re realistically willing to meet season after season.
Integrating New Coping with Your Swim Jet Project
Timing coping replacement alongside your swim jet installation saves money and minimizes disruption. Because the jet installation often requires cutting into or removing a section of decking adjacent to the pool wall — particularly when excavating for an equipment vault — existing coping in that zone will likely be disturbed or destroyed regardless. Rather than patching in a few replacement pieces that never quite match the weathered originals, replacing the full perimeter delivers a uniform appearance and lets you choose a profile that better suits swimmers using the current. A bullnose or rolled-edge profile, for instance, gives a comfortable forearm rest for swimmers pausing mid-set, while a cantilevered design with a slight overhang hides the waterline tile and creates a clean shadow line. Coordinate with your contractor so that coping demolition happens before the swim jet plumbing is sealed and backfilled — this sequence prevents accidental damage to new pipe runs. Once the jet system passes its pressure test, masons can set fresh coping on a properly prepared bond beam, ensuring level alignment and consistent overhang around the entire pool. The result is a finished edge that looks intentional rather than retrofitted, tying the new equipment seamlessly into a pool that appears purpose-built for current swimming.
Maintaining Your New Swim-Current Pool
Once your swim jet system is operational, consistent maintenance keeps it performing at peak efficiency and extends its lifespan. Inspect the nozzle housings monthly for debris buildup, calcium deposits, or small objects that could restrict flow — a clogged nozzle not only weakens the current but forces the motor to work harder, increasing energy consumption and wear. Clean the dedicated strainer basket weekly during swimming season, since the jet system cycles significantly more water than a standard return line and catches debris faster. Your filter — whether cartridge or media-based — needs attention on a shorter schedule than before; plan to clean or backwash it roughly twice as often as you did prior to installation. Before winter arrives in freeze-prone regions, drain all water from the jet housing, plumbing manifold, and nozzle lines using compressed air to prevent ice damage to seals and fittings. If you notice pulsing in the current, unusual motor noise, or reduced flow at higher speed settings, check for air leaks at plumbing unions first — a loose fitting or degraded O-ring is the most common culprit and an inexpensive fix when caught early.
Planning Your Swim Jet Investment for Long-Term Value
Installing a swim jet transforms a static backyard pool into something far more valuable — a versatile space that serves serious athletes, casual fitness swimmers, rehabilitating patients, and kids looking for adventure all in the same afternoon. The project demands careful planning across multiple fronts: understanding the full swim jet P series price beyond the sticker on the unit itself, budgeting for electrical upgrades and professional labor, and sequencing the work so that complementary improvements like fresh pool coping happen at the right moment without inflating costs or extending timelines.
What makes this upgrade worth the complexity is the outcome. You gain an endless swimming experience in a pool that may have previously felt too small for real exercise, and you do it without sacrificing yard space to a fifty-foot lap lane. The key is working with experienced professionals who can evaluate your specific pool structure, recommend the right equipment tier for your goals, and execute the installation to code. Reach out to a qualified swim jet installer for a site evaluation — once you see the current flowing and feel the resistance pulling against your stroke, you’ll wonder why you waited.